

On-the-Go Repairs Made Easy: Must-Have Bike Tool Kits
September 1, 2023


Enhancing User Experiences: Integrating ChatGPT API Into Your App
September 2, 2023In this comprehensive article, we will be taking you on a journey through the world of bike repairs. From fixing simple punctures to adjusting gears and brakes, we have got you covered with our ultimate guide to building your very own essential bike tool kit. Whether you are a seasoned cyclist or a beginner just getting acquainted with the joys of biking, this guide will provide you with all the knowledge and tools you need to confidently handle any repairs or maintenance your bike may require. So grab your wrenches and get ready to become your own bike mechanic – let’s dive into the world of DIY bike repairs!
1. Tire Repair
When it comes to maintaining your bike, one of the most common issues you may encounter is a flat tire. Thankfully, with the right tools and knowledge, patching or changing a tube, fixing a flat tire, and even installing tubeless tires can be easily done by yourself.
1.1 Patching a Tube
Patching a tube is a cost-effective way to repair small punctures or holes. To patch a tube, you will need a patch kit which typically includes patches, vulcanizing solution, and sandpaper. First, locate the puncture on your tube by inflating it slightly and listening for any hissing sounds. Once you find the hole, deflate the tube completely and roughen the area around the hole with sandpaper. Apply the vulcanizing solution to the area and let it dry for a minute. Next, carefully place the patch over the hole and press it firmly, ensuring good adhesion. Give it some time to set, and then you’re ready to re-install the tube and get back on the road.
1.2 Changing a Tube
Sometimes, patching a tube won’t be enough, especially if the damage is severe. In such cases, it’s best to replace the tube altogether. To change a tube, start by removing the wheel from the bike. Next, deflate the tube completely and use a tire lever to pry one side of the tire off the rim. Once one side is off, remove the damaged tube and replace it with a new one. Make sure to match the tube size with your tire size. Before inflating the new tube, check the inside of the tire for any sharp objects that might have caused the puncture. Once you’re sure it’s clear, carefully re-install the tire onto the rim, ensuring that the tube is not pinched between the tire and the rim. Finally, inflate the tube to the recommended pressure and give it a quick spin to check for proper alignment.
1.3 Fixing a Flat Tire
Fixing a flat tire is a slightly different process from patching or changing a tube. It involves locating the source of the flat, which could be a puncture, a pinch flat, or even a damaged tire. Start by removing the wheel and deflating the tire completely. Inspect the tire for any foreign objects stuck in the tread or sidewall. If you find any, carefully remove them. Next, check the rim tape to ensure it’s properly seated and not causing any internal punctures. If necessary, replace the rim tape. Once you’ve addressed these issues, you can either patch the tube if the puncture is small, or replace the tube if the damage is more extensive. After patching or replacing the tube, re-install the tire onto the rim and inflate it to the recommended pressure. Give it a spin to ensure it’s properly aligned and you’re good to go.
1.4 Installing Tubeless Tires
Tubeless tires have become increasingly popular among cyclists due to their enhanced performance and lower risk of punctures. However, installing tubeless tires can be a bit trickier than traditional tires. To install tubeless tires, start by removing the old tires and tubes from the wheel. Next, thoroughly clean the rim and apply a tubeless rim tape to seal the spoke holes. Once the rim tape is applied, install a tubeless valve into the valve hole on the rim. Mount the tubeless tire onto the rim by using your hands or tire levers if necessary, ensuring that the bead of the tire sits evenly all the way around the rim. Once the tire is mounted, add sealant through the valve stem and inflate the tire. Spin the wheel to evenly distribute the sealant and check for any leaks. If necessary, add more sealant or reposition the tire. Finally, inflate the tire to the recommended pressure and you’re ready to hit the trails with your new tubeless setup.
2. Brake Adjustments
properly functioning brakes are essential to ensure your safety while riding. In this section, we’ll cover how to adjust brake pads, align brake calipers, and replace brake pads.
2.1 Adjusting Brake Pads
Brake pads can wear down over time, reducing their effectiveness. To ensure optimal braking performance, it’s important to regularly check and adjust your brake pads. Start by loosening the nut or bolt that holds the brake pad to the caliper arm. Position the pad so that it makes even contact with the rim or rotor when the brake is engaged. Tighten the nut or bolt to secure the pad in place. Repeat this process for the other brake pad, ensuring both pads are properly aligned and positioned.
2.2 Aligning Brake Calipers
If your brakes feel uneven or make rubbing noises, it may be necessary to align the brake calipers. Begin by loosening the mounting bolt that holds the caliper in place. Squeeze the brake lever to engage the caliper and center it over the rim or rotor. While holding the brake lever, tighten the mounting bolt to secure the caliper in the correct position. Release the brake lever and check for any rubbing or misalignment. Make any necessary adjustments until the calipers are properly aligned and the brakes function smoothly.
2.3 Replacing Brake Pads
Over time, brake pads can wear out and lose their stopping power. When this happens, it’s important to replace them for optimal braking performance. Start by removing the old brake pads from the caliper. Depending on the type of brakes you have, this may involve loosening a retaining screw, sliding out the old pad, or removing a pin or clip. Once the old pads are removed, insert the new pads into the caliper, making sure they are properly aligned with the rim or rotor. Secure the pads in place according to the manufacturer’s instructions. Repeat this process for the other brake pad, and then test the brakes to ensure proper functionality.


3. Gear Adjustments
Smooth and precise shifting is crucial for an enjoyable and efficient ride. In this section, we’ll discuss how to index gears, adjust gear cable tension, and replace gear cables.
3.1 Indexing Gears
Indexing gears ensures that your bike shifts smoothly and accurately between gears. Start by shifting the chain to the smallest chainring in the front and the smallest cog in the back. Loosen the cable anchor bolt on the derailleur and manually move the derailleur to align it with the smallest cog. While holding the derailleur in place, tighten the cable anchor bolt. Shift through the gears to ensure smooth shifting. If the chain hesitates or makes noise while shifting, adjust the barrel adjuster on the derailleur or shifter until the shifting is smooth and precise.
3.2 Adjusting Gear Cable Tension
Improper gear cable tension can result in sluggish or unreliable shifting. To adjust the tension, start by shifting to the smallest chainring in the front and the smallest cog in the back. Loosen the cable anchor bolt on the derailleur and adjust the barrel adjuster on the derailleur or shifter to add tension to the cable. Shift through the gears to ensure smooth and precise shifting. If the chain hesitates or makes noise while shifting, make additional adjustments to the barrel adjuster until the shifting is optimal.
3.3 Replacing Gear Cables
Over time, gear cables can become frayed or worn, affecting the performance of your bike’s shifting. To replace a gear cable, start by shifting to the smallest chainring in the front and the smallest cog in the back. Loosen the cable anchor bolt on the derailleur and remove the old cable from the derailleur housing. Feed the new cable through the derailleur housing, ensuring it is seated properly. Attach the cable to the derailleur and tighten the cable anchor bolt. Shift through the gears to ensure smooth and accurate shifting. If necessary, make adjustments to the barrel adjuster until the shifting is optimal.
4. Chain Maintenance
The chain is one of the most critical components of your bike’s drivetrain. Proper chain maintenance is essential for smooth and efficient pedaling. In this section, we’ll cover cleaning and lubricating the chain, as well as replacing a worn-out chain.
4.1 Cleaning and Lubricating the Chain
Regularly cleaning and lubricating your chain will help extend its lifespan and improve shifting performance. Start by placing a rag or newspaper beneath the chain to catch any dirt or excess lubricant. Use a chain cleaning tool or a brush to scrub the chain, removing any dirt, debris, or old lubricant. Once the chain is clean, wipe it dry with a clean rag. Apply a suitable bicycle chain lubricant to each individual roller on the chain, making sure to cover the entire length. After applying the lubricant, wipe off any excess with a clean rag to prevent attracting dirt. Allow the lubricant to penetrate the chain for a few minutes before wiping off any excess moisture.
4.2 Replacing a Chain
Over time, chains can stretch, wear out, and become less efficient. Replacing a worn-out chain is crucial to prevent premature wear on the cassette or chainrings. To replace a chain, start by shifting to the smallest chainring in the front and the smallest cog in the back. Use a chain tool to break the old chain by driving the pin out. Measure the length of the new chain against the old chain to ensure it is the appropriate length. Thread the new chain through the derailleur, making sure it follows the correct path. Connect the ends of the chain using the chain’s quick link or by installing a new pin. Once connected, carefully shift through the gears to ensure smooth and accurate shifting. Adjust the rear derailleur if necessary to eliminate any chain skipping or noise.


5. Pedal and Crank Maintenance
The pedals and cranks are responsible for transferring power from your legs to the drivetrain. Proper maintenance and inspection are necessary to prevent any issues that may compromise your riding experience. In this section, we’ll discuss tightening or replacing pedals and checking the crank and bottom bracket.
5.1 Tightening or Replacing Pedals
Loose or worn-out pedals can negatively affect your pedaling efficiency and control. To tighten or replace pedals, start by using a pedal wrench to remove the pedal from the crank arm. Inspect the threads on the crank arm and pedal spindle for any damage or wear. Apply a small amount of grease to the pedal spindle threads before re-installing the pedal. Begin threading the pedal into the crank arm by hand to avoid cross-threading. Once it is threaded in as far as it will go, use the pedal wrench to tighten it securely. Repeat this process for the other pedal, ensuring both are tightened to the appropriate torque specifications.
5.2 Checking Crank and Bottom Bracket
The crank connects the pedals to the bottom bracket, which houses the bearings that allow the crank to rotate smoothly. Regularly checking the crank and bottom bracket is important to prevent any issues that may affect your pedaling. Start by visually inspecting the crank arms for any cracks or damage. Next, grab the cranks and try to move them laterally. If you notice any play or movement, it may indicate a loose bottom bracket. To check the bottom bracket, hold onto one crank arm and try to wiggle it in a horizontal motion. If there is any movement or clicking, it’s a sign that your bottom bracket may need adjustment or replacement. If you’re unsure how to perform these tasks, it’s recommended to take your bike to a professional bike shop for assistance.
6. Wheel Truing
A true wheel is a straight and properly tensioned wheel, which is essential for a smooth and stable ride. In this section, we’ll cover how to check for bent wheels and use a spoke wrench to true wheels.
6.1 Checking for Bent Wheels
Bent or out-of-true wheels can cause issues such as brake rubbing or poor handling. To check for a bent wheel, spin it and observe the gap between the brake pads and the rim. If you notice any variations in this gap, it could indicate wheel misalignment. Alternatively, you can also use a truing stand or a zip tie as an improvised indicator to check for side-to-side or up-and-down movement in the rim.
6.2 Using a Spoke Wrench to True Wheels
If you’ve determined that your wheel is out of true, you can use a spoke wrench to make adjustments and bring the wheel back into alignment. Start by identifying the areas where the rim deviates from true. Locate the nearest spoke to the area and adjust its tension by turning the spoke nipple with the spoke wrench. To move the rim closer to the spoke, turn the nipple clockwise; to move it away from the spoke, turn the nipple counterclockwise. Make small adjustments and re-check the truing by spinning the wheel. Repeat this process, working your way around the wheel, until it is properly trued and alignment issues are resolved.


7. Headset and Handlebar Maintenance
The headset and handlebar are essential components for steering and controlling your bike. Proper maintenance of these parts is crucial for a safe and enjoyable ride. In this section, we’ll discuss adjusting headset bearings and handlebar position.
7.1 Adjusting Headset Bearings
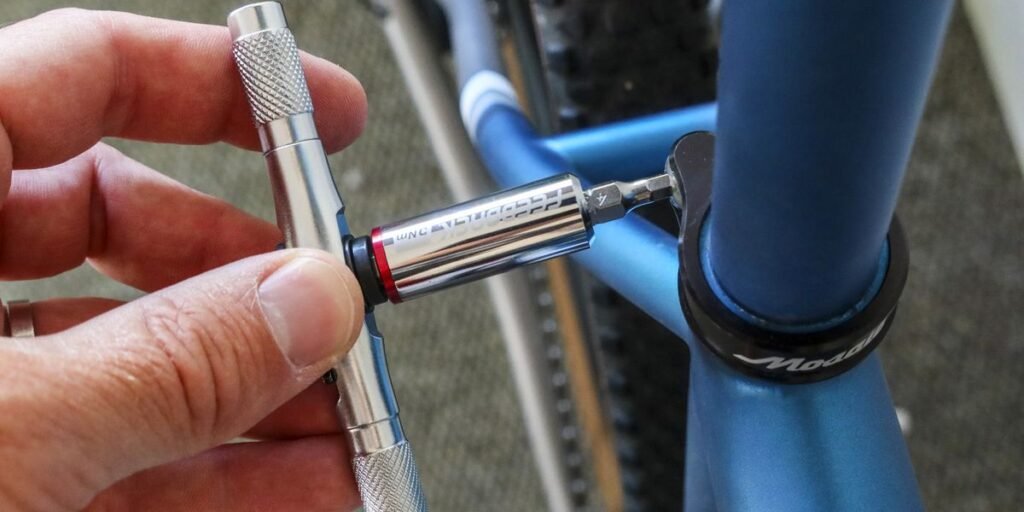
The headset bearings allow your handlebars to steer smoothly and without any play. Over time, headset bearings may become loose or develop excessive play. To adjust headset bearings, start by loosening the stem bolts that secure the handlebar to the steerer tube. Next, loosen the top cap bolt at the top of the headset. Using a hex key, tighten the headset preload bolt on the top cap until you feel a slight resistance. This ensures the headset bearings are properly adjusted. While maintaining pressure on the preload bolt, tighten the stem bolts securely. Finally, check the headset for any play by gently rocking the bike back and forth. If you notice any play, repeat the adjustment process until the headset is properly tightened.
7.2 Adjusting Handlebar Position
The handlebar position affects your riding comfort and control. To adjust the handlebar position, start by loosening the stem bolts that secure the handlebar to the steerer tube. Depending on your desired adjustment, you can either raise or lower the handlebar and then rotate it to the desired angle. Ensure the handlebar remains centered and aligned with the front wheel. Once you’re satisfied with the position, tighten the stem bolts securely. Test the handlebar by applying pressure and ensure it is properly secured and does not slip.
8. Saddle and Seatpost Maintenance
The saddle and seatpost are crucial components for rider comfort and proper bike fit. In this section, we’ll cover adjusting saddle height and cleaning and lubricating the seatpost.
8.1 Adjusting Saddle Height
The correct saddle height is essential for comfortable pedaling and efficient power transfer. To adjust the saddle height, stand over the bike with both feet flat on the ground. Have a friend hold the bike steady or use a bike stand for added stability. Loosen the seatpost clamp bolt or quick-release lever and adjust the saddle height by sliding it up or down. Ensure the saddle is level and tighten the clamp bolt or quick-release lever securely. To check the ideal saddle height, sit on the bike with your feet on the pedals in the 3 o’clock and 9 o’clock positions. Your legs should have a slight bend at the knees when the pedals are at the lowest point.
8.2 Cleaning and Lubricating the Seatpost
Over time, seatposts can become dirty or develop a tendency to stick. Cleaning and lubricating the seatpost will ensure smooth and hassle-free adjustments. Start by removing the seatpost from the bike by loosening the seatpost clamp bolt or quick-release lever. Use a clean rag or sponge to wipe away any dirt or grime on the seatpost. If the seatpost shows signs of corrosion, you can use fine grit sandpaper or steel wool to remove the corrosion. Once the seatpost is clean and dry, apply a thin layer of grease or anti-seize compound to the portion of the seatpost that is inserted into the frame. Re-insert the seatpost into the frame and tighten the clamp bolt or quick-release lever securely. Test the seatpost to ensure it moves smoothly and without any resistance.


9. Basic Bike Cleaning
Regularly cleaning your bike not only keeps it looking great but also contributes to the longevity of its components. In this section, we’ll cover cleaning the frame and components, cleaning the drivetrain, and polishing and protecting the bike.
9.1 Cleaning the Frame and Components
To clean the frame and components, start by rinsing your bike with water to remove any loose dirt and debris. Use a bucket of soapy water and a sponge or soft brush to scrub the frame, fork, handlebars, and other components. Be sure to pay attention to hard-to-reach areas and crevices where dirt and grime can accumulate. After scrubbing, rinse the bike thoroughly with clean water to remove any soap residue. Dry the frame and components with a clean towel or allow them to air dry.
9.2 Cleaning the Drivetrain
The drivetrain, including the chain, cassette, and chainrings, can accumulate a significant amount of dirt and grease. Cleaning the drivetrain regularly will improve shifting performance and prolong the life of your components. Start by applying a biodegradable degreaser or chain cleaner to the chain, cassette, and chainrings. Use a chain brush or an old toothbrush to scrub these components thoroughly, removing any grime or buildup. Rinse the drivetrain with water and dry it with a towel or allow it to air dry. Once dry, apply a suitable bicycle chain lubricant to the chain, ensuring all the links are evenly coated. Wipe off any excess lubricant with a clean rag and let it sit for a few minutes to penetrate the chain.
9.3 Polishing and Protecting the Bike
Polishing and protecting your bike’s frame can help maintain its appearance and protect it from the elements. Start by applying a suitable bike polish or protectant to a clean, dry cloth. Gently rub the polish onto the frame, fork, and other painted surfaces, following the manufacturer’s instructions. Pay attention to any areas with scratches or scuffs, as the polish can help minimize their appearance. Once applied, buff the surfaces with a clean, dry cloth to remove any excess polish and achieve a shiny finish. Avoid applying polish to braking surfaces or areas that come into contact with the chain, as it can affect braking performance and cause the chain to slip.
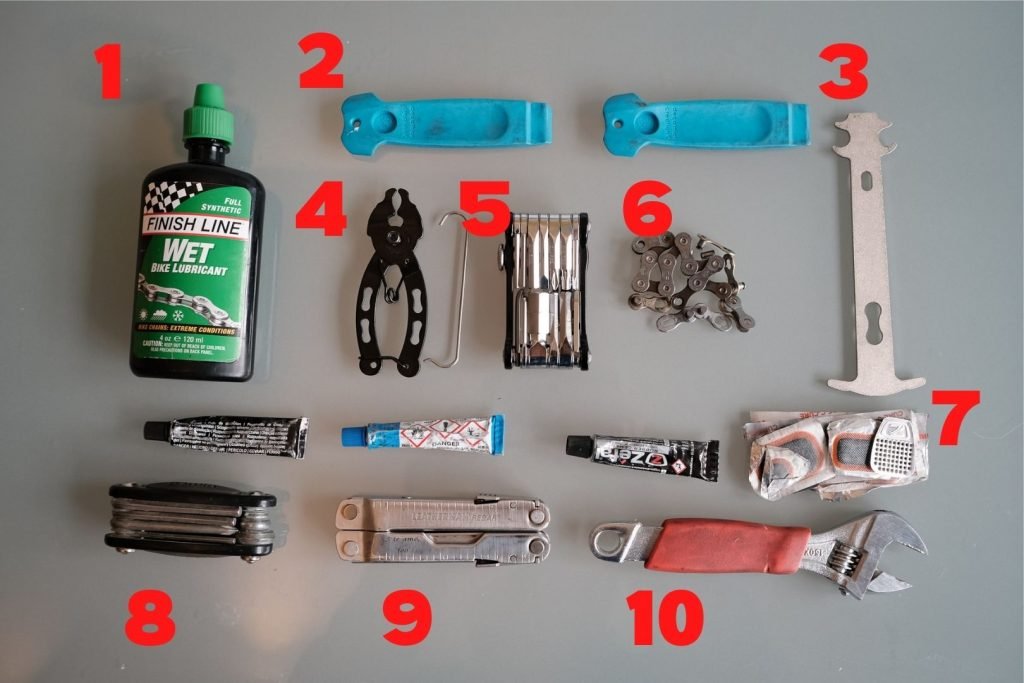
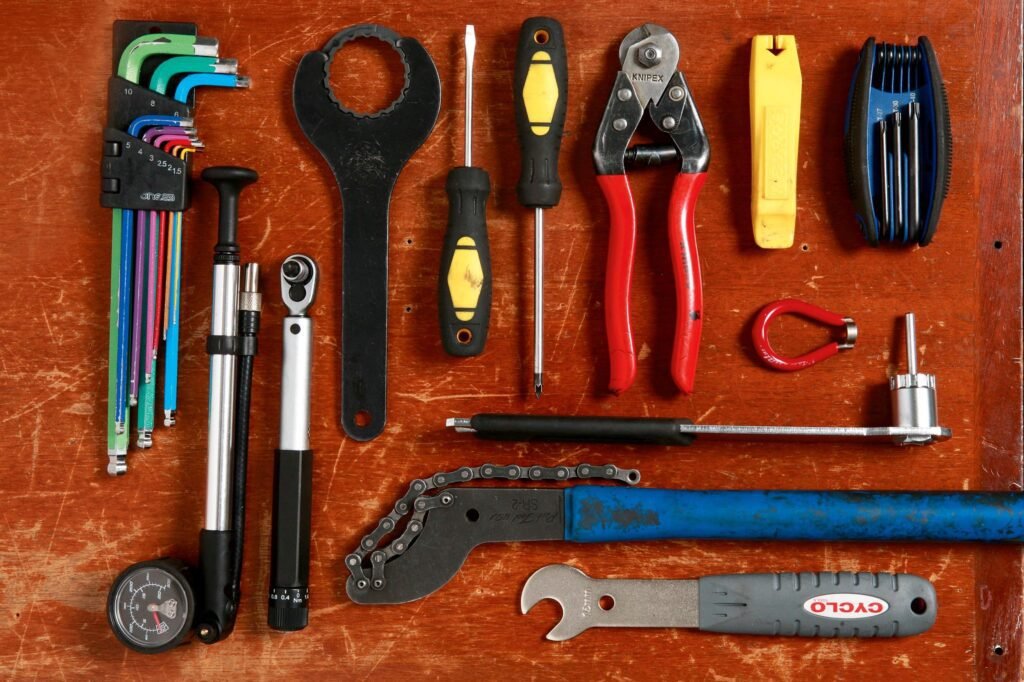
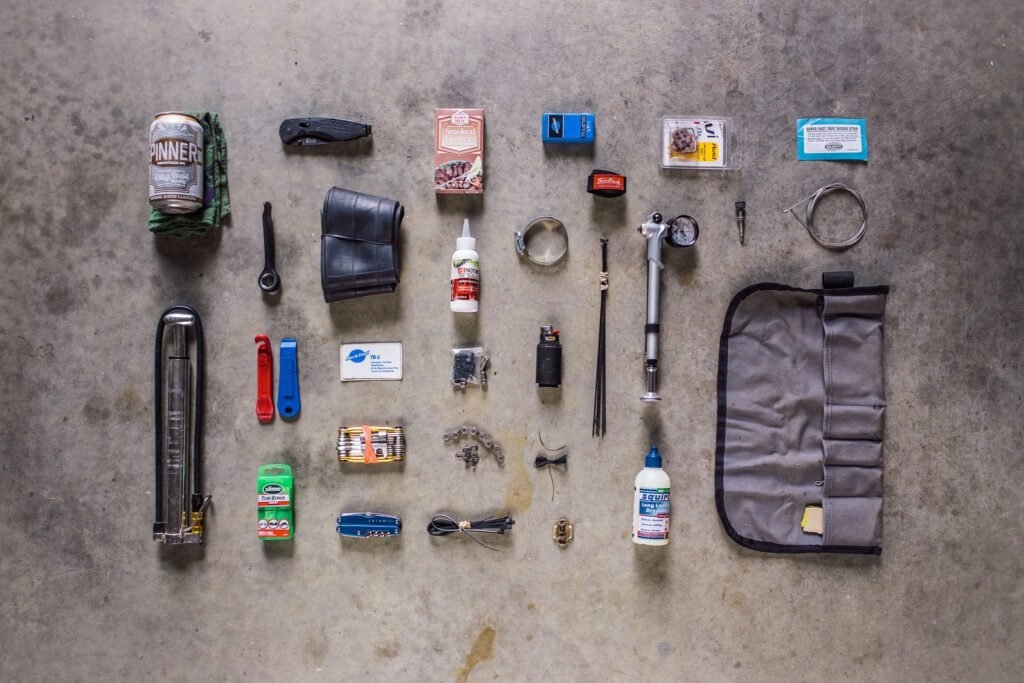
10. Essential Tools to Include in Your Bike Tool Kit
Now that you’re familiar with various bike repairs and maintenance tasks, it’s essential to have the right tools at your disposal. In this section, we’ll outline the essential tools to include in your bike tool kit.
10.1 Basic Tools
- Bike multi-tool with various wrench sizes
- Hex keys (metric and imperial)
- Screwdrivers (flathead and Phillips)
10.2 Tire Repair Tools
- Patch kit
- Spare tubes
- Tire levers
- Pump or CO2 inflator
10.3 Brake and Gear Tools
- Cable cutters or quality scissors
- Brake pad alignment tool
- Cable puller or needle-nose pliers
- Barrel adjusters
10.4 Chain and Crank Tools
- Chain tool
- Chain wear indicator
- Crank puller
- Bottom bracket tool
10.5 Wheel Truing Tools
- Spoke wrench (appropriate size for your spokes)
- Truing stand or improvised indicator
10.6 Headset and Handlebar Tools
- Adjustable wrench or headset wrench
- Torque wrench (for stem bolts)
- Handlebar tape or grip adhesive
10.7 Saddle and Seatpost Tools
- Allen key or quick-release skewer (for seatpost clamp)
- Grease or anti-seize compound
10.8 Cleaning Tools
- Soft brush or sponge
- Bucket
- Clean rags or towels
- Bike-specific cleaning solutions (frame polish, degreaser, etc.)
With these essential tools in your bike tool kit, you’ll be well-equipped to handle basic repairs and maintenance tasks on your own. Remember to always prioritize safety and consult professional help if you’re unsure about any repairs or adjustments. Regular maintenance and care will keep your bike in great condition and ensure a smooth and enjoyable ride. Happy cycling!


